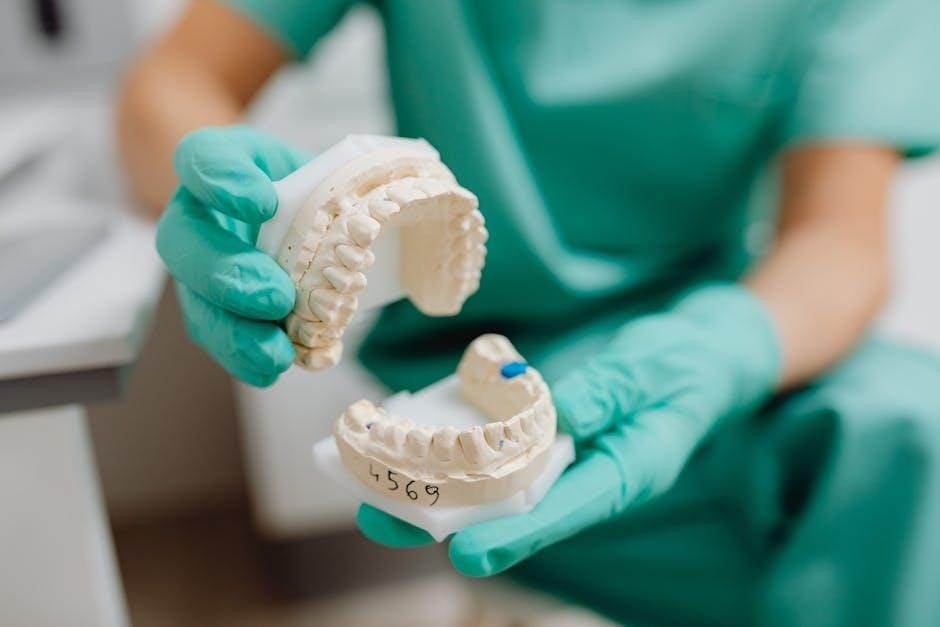
A well-organized dental tray setup is crucial for efficiency, patient safety, and successful procedures. It ensures all necessary instruments are sterilized, accessible, and properly arranged, allowing dental assistants to focus on supporting the dentist effectively during treatments.
1.1 Importance of Proper Tray Setup in Dental Procedures
Proper tray setup is vital for maintaining efficiency, infection control, and patient safety during dental procedures. A well-organized tray ensures all necessary instruments are sterilized, easily accessible, and arranged logically, minimizing delays. It also helps prevent cross-contamination and reduces the risk of misplacing critical tools. Proper setup allows the dental team to focus on the procedure without distractions, ensuring a smooth workflow. This organization is essential for delivering high-quality care and maintaining a professional, safe environment for both patients and dental staff.
1.2 Role of the Dental Assistant in Tray Preparation
The dental assistant plays a critical role in tray preparation by setting up and organizing instruments according to the procedure. This includes ensuring all tools are sterilized, arranging them in a logical order, and anticipating the dentist’s needs. Proper tray setup enhances efficiency, reduces delays, and supports infection control. The assistant must also verify the availability of necessary materials and restock supplies as needed. Accurate preparation ensures smooth workflow, allowing the dental team to focus on patient care and maintain a safe, professional environment throughout the procedure.
Basic Tray Setup for Common Dental Procedures
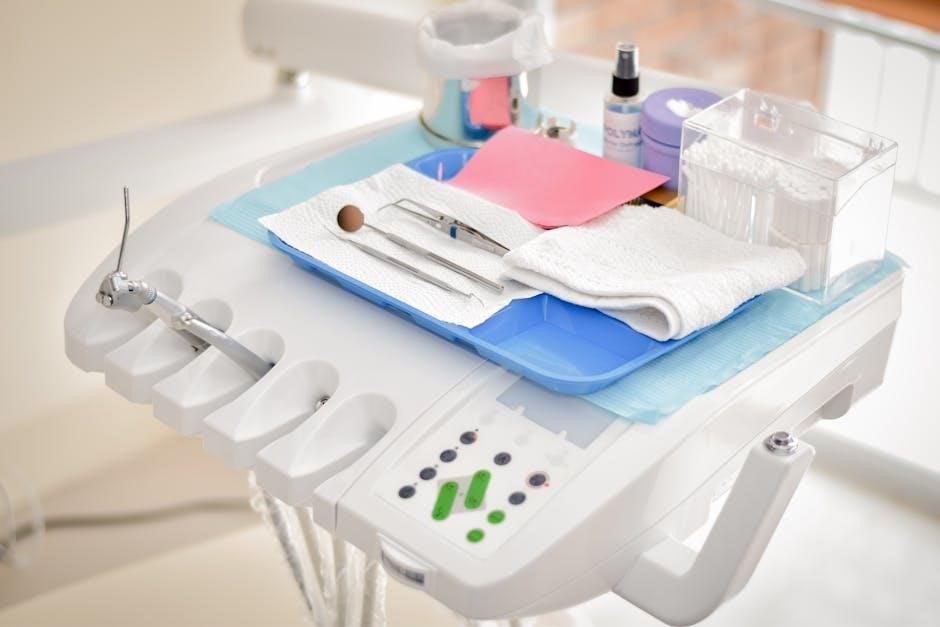
A basic tray setup includes essential instruments like mirrors, probes, and suction devices, organized to streamline procedures. Proper arrangement ensures efficiency and quick access during treatments.
2.1 Essential Instruments and Materials Needed
The basic tray setup requires mirrors, probes, suction devices, and anesthetic syringes. Materials like gloves, cotton rolls, and gauzes are also essential. Sterilization items, such as autoclave bags and plastic barriers, ensure infection control. Proper arrangement of these tools streamlines procedures, enhancing efficiency and patient safety.
2.2 Step-by-Step Guide to Arranging Instruments
Begin by placing basic instruments like mirrors and probes on the left side of the tray. Next, add procedure-specific tools such as scalers or drills, arranging them in the order of use. Ensure suction devices and anesthetic syringes are easily accessible. Finally, position disposable items like cotton rolls and gauzes on the right for quick retrieval. This systematic approach ensures efficiency and minimizes delays during dental procedures.
2.3 Sterilization and Infection Control Measures
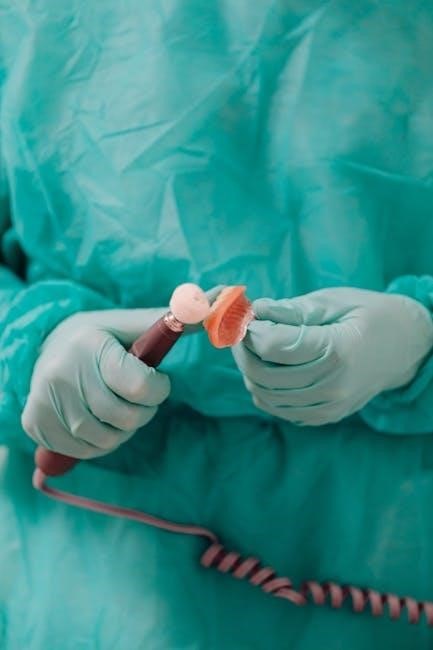
Proper sterilization is critical to prevent infection. Instruments should be autoclaved before and after use, while disposable items must be stored in sealed packets. Tray surfaces should be disinfected with approved chemicals. Always wear gloves when handling instruments, and ensure all items are arranged in a clean, organized manner. Use barrier films on trays to prevent contamination. Follow strict infection control protocols to maintain a sterile environment, ensuring patient safety and compliance with dental standards.

Types of Tray Setups
Dental tray setups vary by procedure, including basic, surgical, periodontal, and orthodontic configurations. Each setup ensures essential instruments are organized, sterile, and readily accessible, optimizing efficiency and patient care.
3.1 Basic Tray Setup for Routine Exams
A basic tray setup for routine exams typically includes essential instruments like mirrors, probes, and explorers. These tools help the dentist assess oral health efficiently. Proper organization ensures quick access, minimizing procedure time and enhancing patient comfort. Sterilization is key to prevent infection, and disposable barriers may be used for added safety. This setup is straightforward and universal, making it ideal for standard check-ups and diagnostics. It streamlines the process, allowing the dental team to focus on delivering quality care effectively.
3.2 Surgical Tray Setup for Complex Procedures
A surgical tray setup for complex procedures requires precision and inclusion of specialized instruments. Typically, it includes surgical scalpels, forceps, retractors, and suction devices. These tools are arranged to ensure easy access during surgery, minimizing delays. The layout is designed to support the surgeon’s workflow, with each instrument positioned for optimal efficiency. Proper sterilization and infection control measures are critical, as these procedures often involve deeper tissue work. The dental assistant plays a key role in preparing and organizing the tray to meet the surgeon’s specific needs, ensuring a smooth and successful procedure.
3.3 Periodontal Tray Setup
A periodontal tray setup is tailored for procedures addressing gum health, such as deep cleanings or pocket reductions. Essential instruments include periodontal probes, scalers, and ultrasonic devices. Additional items like anesthetic supplies and suction tools are often added. The layout prioritizes easy access to instruments, ensuring smooth workflow during treatment. The dental assistant’s role is critical in preparing and organizing the tray to support the dentist efficiently, while maintaining sterility and infection control standards throughout the procedure.
3;4 Orthodontic Tray Setup
An orthodontic tray setup is designed for procedures like bracket placement, wire adjustments, and appliance removal. Key instruments include orthodontic pliers, band removers, and archwire cutters. Additional items like elastomerics, bonding agents, and polishing burs are often included. The tray should be organized to allow quick access to tools, minimizing procedure time. Dental assistants must ensure all instruments are sterilized and arranged logically to support the orthodontist’s workflow efficiently, while adhering to infection control protocols throughout the setup process.
Instruments and Materials
Dental tray setups require specific instruments and materials, such as probes, mirrors, and disposable items, to ensure efficiency and patient safety during procedures.
4.1 Primary Instruments for Dental Tray Setup
The primary instruments for dental tray setup include periodontal probes, dental mirrors, and explorer tools. These tools are essential for examining and diagnosing dental conditions. Additionally, mixing bowls and impression materials are often required for specific procedures. Instruments must be sterilized and organized to ensure quick access during treatments, enhancing efficiency and patient care. Proper arrangement of these tools is critical for seamless dental operations and effective communication between the dentist and assistant.
4.2 Disposable vs. Reusable Materials
Dental tray setups often combine disposable and reusable materials to balance cost and infection control. Disposable items, such as plastic tray barriers and single-use instruments, minimize cross-contamination risks. Reusable materials, like metal instruments, are cost-effective but require rigorous sterilization. Impressions and alignates are typically disposable, while mirrors and probes are reusable. The choice depends on the procedure’s complexity and infection control protocols. Proper handling of both types ensures efficiency and patient safety, maintaining a sterile environment while optimizing resource use.
4.3 Specialized Instruments for Specific Procedures
Different dental procedures require unique instruments tailored to their specific needs. For root canals, endodontic files and reamers are essential, while periodontal treatments use scalers and curettes. Orthodontic procedures often involve specialized pliers and bracket-removal tools. Surgical trays include retractors and forceps for tissue handling. These instruments are selected based on the procedure’s complexity and the dentist’s preferences, ensuring efficiency and precision; Their proper arrangement in the tray is critical for smooth workflow and effective patient care during specialized treatments.
Step-by-Step Tray Setup Procedures
Prepare the tray with essential instruments, organize them logically, and conduct a final check to ensure efficiency and compliance with the dentist’s preferences and patient safety standards.
5.1 Preparing the Tray Before the Procedure
Start by gathering all necessary instruments and materials based on the procedure type. Arrange them logically, ensuring frequently used tools are within easy reach. Use tray barriers or plastic covers for infection control. Place cotton balls, gauze, and suction devices in designated areas. Verify the autoclave sterilization of reusable instruments and check for any damaged or missing items. Ensure the tray is clean and dry before adding supplies. Double-check the setup against the procedure checklist to avoid last-minute adjustments.
5.2 Organizing Instruments for Efficiency
Arrange instruments in a logical sequence based on the procedure steps, ensuring easy access during treatment. Group similar tools together, such as all suction devices or handheld instruments. Place frequently used items near the dentist’s dominant hand for quick retrieval. Use visual aids like color-coded tags to differentiate instrument types. Maintain proper spacing to avoid overcrowding, which can hinder efficiency. Ensure all items are within the assistant’s line of sight to streamline workflow. Restock and reorganize the tray immediately after each procedure to prepare for the next patient.
5.3 Final Check Before Presenting to the Dentist
Before presenting the tray to the dentist, conduct a thorough inspection to ensure all instruments are clean, sterile, and correctly arranged. Verify that no essential tools are missing and that all materials, such as suction tips or cotton rolls, are adequately stocked. Check the layout for accessibility, ensuring the most frequently used instruments are within easy reach. Confirm that all disposable items are properly sealed and that the tray is free from any contamination. This final review ensures efficiency and reduces delays during the procedure.
Maintenance and Organization
Regular cleaning and disinfecting of trays and instruments are essential. Store items in designated areas to prevent damage and ensure quick access. Replenish supplies daily to maintain readiness for procedures.
6.1 Cleaning and Disinfecting the Tray
Cleaning and disinfecting the tray is a critical step to prevent cross-contamination. Dental assistants should use approved disinfectants and follow manufacturer guidelines. Remove all instruments and wipe the tray with a sterile solution. Allow it to air dry before storing. Regular cleaning ensures the tray remains hygienic and ready for future use. Proper disinfection also prolongs the life of the tray and maintains a safe environment for both patients and staff.
6.2 Proper Storage of Instruments
Proper storage of dental instruments is essential to maintain their quality and ensure they remain sterile. Instruments should be stored in a clean, dry environment, away from direct sunlight. Use protective cases or dividers to prevent damage and organize items for easy access. Labeling storage areas can help in quickly locating specific tools. Regularly inspect stored instruments for signs of wear or corrosion. Proper storage not only extends the lifespan of instruments but also ensures they are ready for use in future procedures.
6.4 Replenishing Supplies After Each Use
Replenishing supplies after each use is vital for maintaining efficiency and preparedness. Check inventory levels regularly and restock essential items like gloves, cotton rolls, and disposable instruments. Ensure all materials are within their expiration dates and properly sealed. Organize supplies in designated areas for quick access during procedures. This step prevents delays and ensures that the dental team is always ready for the next patient. Proper replenishment also supports infection control by using fresh, sterile materials for every procedure.
Common Mistakes to Avoid
Forgetting essential instruments, improper sterilization, and disorganizing the tray layout are common errors. These mistakes can delay procedures, compromise safety, and reduce efficiency. Always double-check setups.
7.1 Forgetting Essential Instruments
Forgetting essential instruments is a common mistake that can disrupt dental procedures. Always cross-reference the procedure with a checklist to ensure all necessary tools are included. Missing items like periodontal probes, suction tips, or anesthesia syringes can delay treatment. Double-check the tray setup before presenting it to the dentist. A well-organized and pre-prepared tray is key to maintaining efficiency and patient safety. Regularly reviewing step-by-step guides can help minimize oversights and improve consistency in tray preparation.
7.2 Improper Sterilization Techniques
Improper sterilization of instruments can lead to cross-contamination and infection risks, compromising patient safety. Always follow established protocols, such as autoclaving, and ensure instruments are properly wrapped or placed in sealed pouches. Disposable barriers should be used for non-sterilizable items. Verify chemical disinfection levels and expiration dates. Inadequate sterilization can result in delayed procedures or the need to repeat treatments, undermining efficiency and patient trust. Proper sterilization techniques are non-negotiable in maintaining a safe and hygienic dental environment. Regular training and adherence to guidelines are essential to prevent such critical errors.
7.3 Disorganizing the Tray Layout
A disorganized tray layout can lead to confusion, delays, and inefficiency during dental procedures. Instruments placed randomly may be difficult to locate, causing frustration for both the dentist and assistant. This chaos can result in missed steps, prolonged procedure times, and increased stress. A cluttered tray also raises the risk of contamination or misplacement of sterile instruments. Proper organization ensures a smooth workflow, allowing the dental team to focus on patient care. Always arrange instruments in a logical, accessible order to maintain efficiency and patient safety during treatments.
Troubleshooting Tips
Troubleshooting tips address common issues like missing instruments, last-minute requests, and time constraints. Staying calm, maintaining organization, and quick thinking are essential for resolving these challenges efficiently.
8.1 Identifying Missing Instruments
Identifying missing instruments requires a systematic approach. Start by cross-checking the tray setup against the procedure list. Use a standardized checklist to ensure all tools are present. If an instrument is missing, notify the dentist immediately. Maintain a backup set of essential instruments nearby. Regularly organizing and restocking supplies can prevent shortages. Proper labeling and storage of tools also help in quickly locating them during emergencies. This proactive approach minimizes delays and ensures smooth workflow during dental procedures.
8.2 Addressing Last-Minute Instrument Requirements
When last-minute instrument needs arise, stay calm and act quickly. Use a checklist to identify missing items and prioritize essentials. Maintain a backup set of frequently used instruments in a sterilized area. Ensure all tools are properly sterilized before use to prevent contamination. Communicate clearly with the dentist to confirm priorities and avoid delays. Efficiently restocking and organizing instruments beforehand can help mitigate unexpected shortages, ensuring the procedure continues smoothly and safely for both the dental team and the patient.
8.3 Managing Time During Setup
Effective time management is critical during tray setup to ensure the procedure begins promptly. Use a checklist to streamline the process and avoid delays. Prioritize tasks based on urgency and complexity, such as sterilizing instruments or arranging tools in a specific order. Maintain a clean and organized workspace to quickly locate items. Pre-sterilize frequently used instruments to save time. By staying focused and anticipating the dentist’s needs, you can complete the setup efficiently, ensuring the procedure runs smoothly and adheres to the scheduled timeline.
Patient Interaction and Communication
Effective communication is key to patient trust and comfort. Dental assistants should clearly explain procedures, address concerns, and ensure understanding to reduce anxiety and ensure cooperation.
9.1 Explaining the Procedure to the Patient
Clear communication is essential for patient understanding and trust. Dental assistants should explain the procedure step-by-step, using simple language to address concerns and ensure clarity. They should discuss what to expect, the purpose of each step, and any necessary aftercare. This helps reduce anxiety and builds rapport. Using visual aids or demonstrations can further enhance comprehension. Ensuring the patient feels informed and comfortable is a key part of the dental assistant’s role in promoting a positive experience and fostering cooperation during treatment.
9.2 Ensuring Patient Comfort and Safety
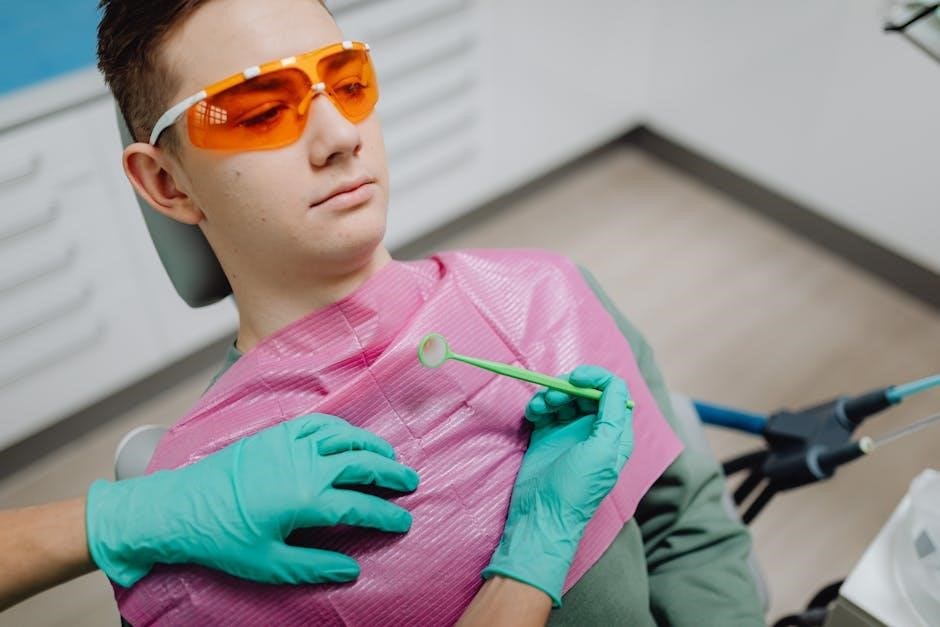
Patient comfort and safety are top priorities for dental assistants. This involves adjusting the dental chair to a comfortable position, using appropriate barriers to prevent contamination, and ensuring the treatment area is clean. Dental assistants should also monitor the patient’s well-being during procedures, offering reassurance and addressing any discomfort promptly. Proper handling of instruments and materials, as well as adherence to infection control protocols, are critical to maintaining a safe environment. Ensuring the patient feels secure and at ease enhances their overall experience and trust in the dental team.
9.3 Handling Patient Anxiety
Dental assistants play a crucial role in addressing patient anxiety. This involves explaining procedures clearly, using calming communication, and creating a reassuring atmosphere. Offering emotional support, maintaining eye contact, and addressing concerns can help reduce fear. Ensuring the treatment area is clean and organized also builds trust. By being attentive and empathetic, dental assistants can make patients feel more at ease, turning a stressful experience into a positive one. Effective communication and a compassionate approach are key to managing anxiety and ensuring a smooth procedure.
Post-Procedure Responsibilities
After the procedure, the dental assistant must clean and sterilize instruments, dispose of single-use items, and prepare the setup for the next patient. This ensures efficiency and readiness for subsequent treatments.
10.1 Cleaning and Sterilizing Instruments
Cleaning and sterilizing instruments is a critical post-procedure step to prevent infection and ensure patient safety. Dental assistants must use ultrasonic cleaners for initial cleanup and autoclaves for sterilization. Instruments should be arranged properly in trays, ensuring they are free from debris and ready for the next use. This process maintains compliance with infection control standards and ensures all tools are fully sanitized for upcoming procedures, supporting efficient and safe dental care delivery.
10.2 Disposing of Single-Use Items
Proper disposal of single-use items is essential for maintaining infection control and compliance with regulations. Dental assistants should segregate items into biohazard, recyclable, and general waste. Needles, scalers, and contaminated materials must be placed in designated biohazard containers. Gloves, masks, and other disposable items should be discarded in general waste bins. Single-use instruments must not be resterilized for reuse. Correct disposal ensures patient safety, prevents cross-contamination, and adheres to OSHA guidelines, maintaining a clean and hygienic environment for all dental procedures.
10.3 Preparing for the Next Patient
After completing the current procedure, the dental assistant must prepare for the next patient by disinfecting all surfaces and ensuring the treatment area is clean. Restock supplies, replace disposable items, and sanitize reusable instruments. Reorganize the tray setup according to the next procedure’s requirements, verifying that all necessary instruments are present and properly arranged. This step ensures efficiency, reduces delays, and maintains organization, allowing the dental team to transition smoothly between patients while upholding high standards of infection control and patient care.
Advanced Tray Setup Techniques
Advanced techniques involve customizing setups for specific dentists, incorporating digital tools for efficiency, and using color-coded instruments for better organization, enhancing workflow and precision in dental procedures.
11.1 Customizing Tray Setup for Specific Dentists
Customizing tray setups for specific dentists enhances efficiency by aligning with their preferences and workflow. This involves organizing instruments based on the dentist’s familiar sequence, ensuring frequently used tools are easily accessible. Personalized setups can also incorporate special accessories, such as syringe systems or specific instrument arrangements, tailored to the dentist’s technique. By adapting to individual styles, dental assistants streamline procedures, reduce delays, and improve overall patient care. This tailored approach fosters a collaborative environment, ensuring seamless communication and execution during treatments.
11.2 Incorporating Digital Tools for Efficiency
Digital tools, such as multifunction printers (MFPs) and specialized software, can enhance tray setup efficiency. These tools allow for automated supply tracking, digital checklists, and real-time updates, ensuring all necessary instruments are accounted for. Digital systems also facilitate customizable presets for specific procedures, reducing preparation time. Additionally, integrated systems can streamline communication between the dental assistant and dentist, ensuring seamless workflow. By leveraging technology, dental assistants can minimize errors, improve organization, and focus on delivering high-quality patient care with increased precision and speed.
11.3 Using Color-Coded Instruments for Better Organization
Color-coding instruments enhances organization and efficiency in dental tray setups. By assigning specific colors to different instrument types or procedures, dental assistants can quickly identify and locate tools, reducing errors. This system also helps maintain sterility, as color-coded trays or instrument holders prevent cross-contamination. For example, orange trays might be used for suction tips, while dark trays could indicate instruments requiring special handling. This method streamlines workflows, improves communication, and ensures that all items are easily distinguishable during procedures, contributing to a more organized and efficient dental practice environment.
Continuing Education and Training
Continuing education is vital for dental assistants to stay updated on modern techniques, instrumentation, and infection control standards, ensuring optimal patient care and professional growth.
12.1 Staying Updated with New Techniques
Staying updated with new techniques is essential for dental assistants to maintain high standards of patient care. Attending workshops, seminars, and online courses provides insights into advanced tray setup methods and infection control. Incorporating digital tools, such as electronic guides, enhances efficiency. Regular training ensures familiarity with specialized instruments and materials, enabling assistants to adapt to evolving dental practices. Continuous learning fosters professionalism and ensures adherence to modern clinical protocols, ultimately improving patient outcomes and streamlining procedures.
12.2 Participating in Workshops and Seminars
Participating in workshops and seminars is vital for dental assistants to enhance their skills and stay updated on the latest techniques. These events provide hands-on training, allowing assistants to master tray setup, sterilization, and instrument organization. Interactive sessions often include step-by-step guides and demonstrations, ensuring practical knowledge. Networking opportunities with peers and experts further enrich the learning experience. By attending such programs, assistants gain confidence and proficiency, ultimately improving their ability to support dentists effectively and ensure seamless patient care.
12.3 Seeking Feedback from Dentists and Peers
Seeking feedback from dentists and peers is essential for professional growth and refining tray setup skills. Constructive criticism helps identify areas for improvement, such as instrument arrangement or sterilization techniques. Regularly requesting input fosters a culture of continuous learning and ensures adherence to best practices. This collaborative approach not only enhances individual performance but also contributes to the overall efficiency of the dental team, ultimately improving patient care and operational effectiveness.